Scything

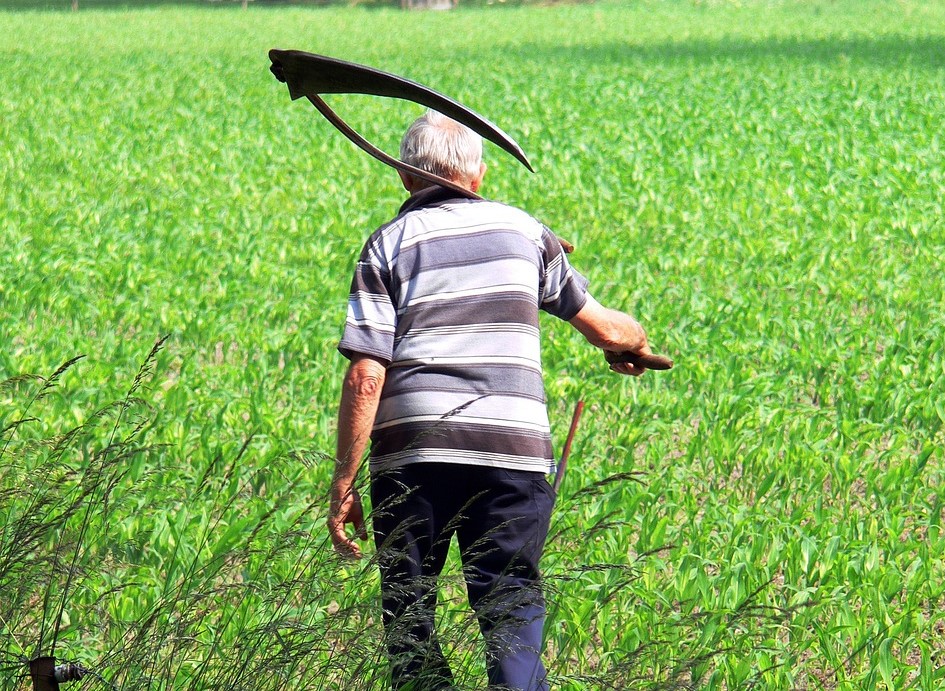
Scything, a traditional method of cutting grass and other vegetation, has experienced a resurgence in recent years as people rediscover its numerous benefits and the sense of peace it brings. By using a scythe to mow your lawn or meadow you can work in harmony with nature. Unlike machines that indiscriminately clear everything in their path, the scythe allows for selective cutting, leaving behind patches of grass and wildflowers for wildlife to thrive.
Although a scythe can look like a crude instrument when first viewed, in the right hands it can be a very efficient tool. Indeed, it’s surprising how much area can be cleared or mown in a short time. Rambling through Youtube scything videos you’ll come across a few ‘man versus machine’ style challenges. On the whole, the scythe favours well - albeit with a user in need of a sit down by the end. It competes especially well with strimmers, clearing open ground quicker but struggling when obstacles such as trees are present. Nevertheless, speed is most likely not your prime goal if scything takes your fancy. Other motivators include: the satisfaction gained from acquiring a longstanding craft, the beneficial exercise involved, the lessened dependence on fossil fuels and the transformation of an aural assault from a strimmer to a meditative swishing soundtrack.
The Parts

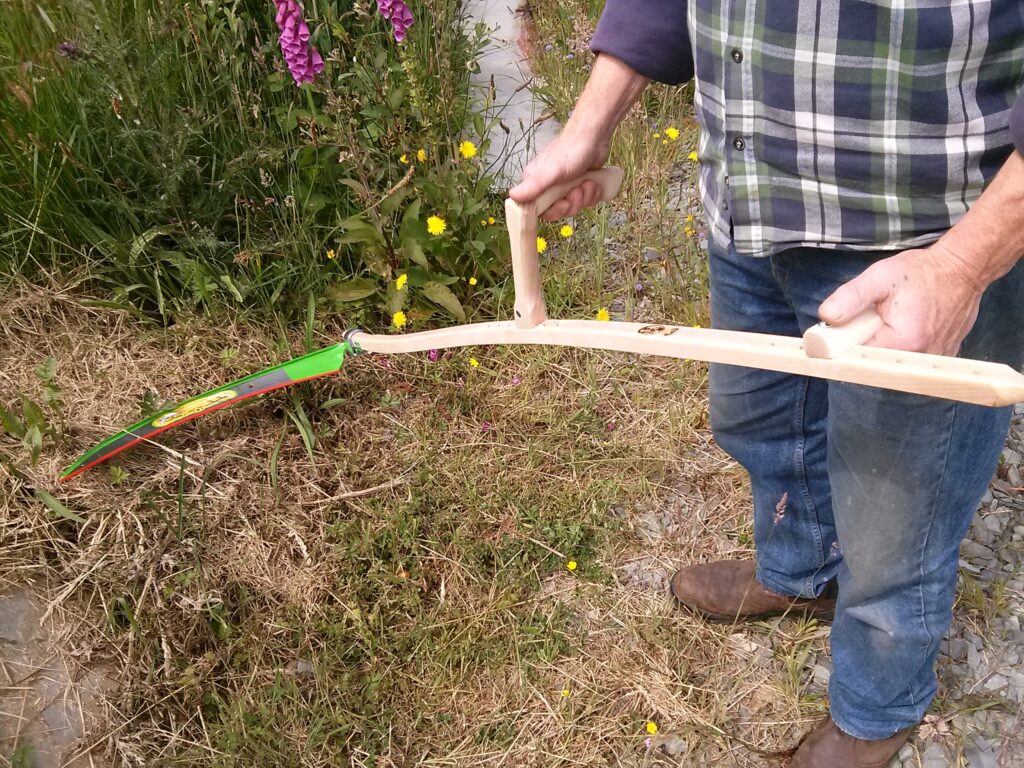
The main shaft of the scythe is called the snath and is around 1.5 meters long. It is traditionally made from wood but sometimes metal these days. Ideally the snath will be curved to allow for a more natural stance when using the tool. There are two handles attached to the snath – one close to the end and one roughly half way down. These should be moveable to allow perfect adjustment to the user’s height. At the business end of the snath is a means, usually some sort of ring clamp, for attaching the curved cutting blade. Again, this should be designed to allow adjustment of the blade so the angle/pitch can be set optimally. As all this mention of adjustment implies, the proper set up of the scythe is crucial to its performance and insuring the proper posture of the user. It is important to consider your height before buying a snath to be sure it will fit nicely.
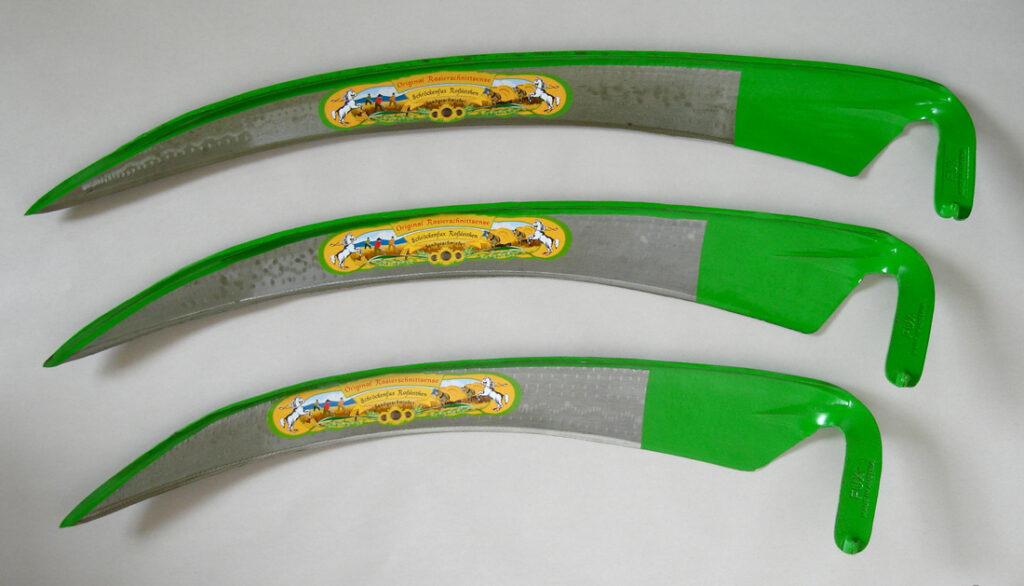
The next choice to make is which blade is required. Good scythe blades are light, wafer thin and sleekly shaped to insure they are easier to sharpen, cut better and don’t dig into the ground. We use Schröckenfux blades which have been hand-forged in an Austrian factory for over 500 years. Austria has a tradition of scythe making which reaches back to the Middle Ages.
It is important not to get carried away at first as the larger the blade the more skill and maintenance required. If you are working on a relatively flat ground with grass or non-woody species, a good first option is the 60cm mowing blade. These have an elevated tip which helps on bumpy areas. They are more forgiving than longer blades and easier to sharpen yet still have plenty of reach.
If you’re dealing with a rougher area, the more robust 45cm clearing blade is ideal. This is a thicker more heavy duty blade which is about the same gauge tool as a light billhook. It is capable of cutting most woody plants up to half an inch in diameter, or bigger, depending on the species; but it is not recommended for grass. It’s typically used to work in areas where there are small saplings, brambles or other weeds with woody stems. It’s also good in areas where there are obstacles like tree trumps or fence posts.
Getting Into The Swing
Scything is a skill that requires practice and proper technique. Here's a step-by-step guide on how to get started:
Preparation:
- Make sure the scythe is adjusted correctly to your height - Lower (L shaped) handle should be at hip height and the higher handle should be positioned so that it is a forearms length (outer elbow to tip of middle finger) plus 5cm from lower handle.
- Sharpen the blade: Ensure that the blade is sharp before you begin. A sharp blade will make your cutting more efficient and reduce the effort required.
Stance and Grip:
- Stand with your feet shoulder-width apart, knees slightly bent. Place your right foot half a shoe length in front of your left.
- Your arms should be in a slight 'A' position from the shoulders to the handles and at a slight angle. Your posture should be relaxed.
The Swing:
- Begin by swinging the scythe back and forth in an arc. Imagine drawing a semi-circle with the blade.
- As you swing, transfer your body weight from one foot to the other, generating power from your legs and hips rather than relying solely on your arms.
- Keep your movements fluid and rhythmic, maintaining a steady pace.
Cutting Technique:
- Start at the edge of the area you want to cut, and work your way inward. The distance from the cutting edge to the ground should be approx. 0.5-1cm at the lowest point.
- Tilt the blade slightly back, so that the heel (the thicker end) of the blade makes contact with the grass first. This helps prevent the blade from getting stuck.
- Apply light pressure as you cut, allowing the sharpness of the blade to do the work. Avoid using excessive force, as it can strain your muscles and make the scything less efficient.
- Move in a smooth, sweeping motion, maintaining a consistent speed and rhythm. Remember to engage your whole body in the movement.
- Deposit the grass without bringing it back with you on the return stroke - make sure the scythe returns taking the same path it used when it went forward, and if necessary give a tiny little flick at the end of the stroke.
Safety Considerations:
- Always be aware of your surroundings. Check for obstacles such as rocks or branches that could damage the blade or cause injury.
- Wear appropriate protective gear, such as sturdy shoes, long pants, and gloves, to protect yourself from any potential hazards.
Remember, scything is a skill that improves with practice. Start with smaller areas and gradually work your way up to larger fields or meadows. As you become more comfortable and proficient, you'll find yourself attuned to the natural rhythms of scything, experiencing the joy of this ancient and rewarding practice.
Maintaining The Blade
Once the scythe is set up properly the next, and more difficult, maintenance task is to keep the blade in good shape. There are two parts to this: peening and sharpening. Sharpening and honing blades is an art in itself and it’s easy to get intimidated by the technicalities when researching how to do it. It is important to get to grips with sharpening, though, as it is essential to fruitful scything. Heavy use of a blunt blade on tough material could easily damage the snath or bend the blade. Peening involves periodically thinning out the steel of the blade whilst sharpening is the more frequent care of the blades edge. As blades come ready for the field both peened and sharp, the first of these tasks you will come across is sharpening.
Sharpening
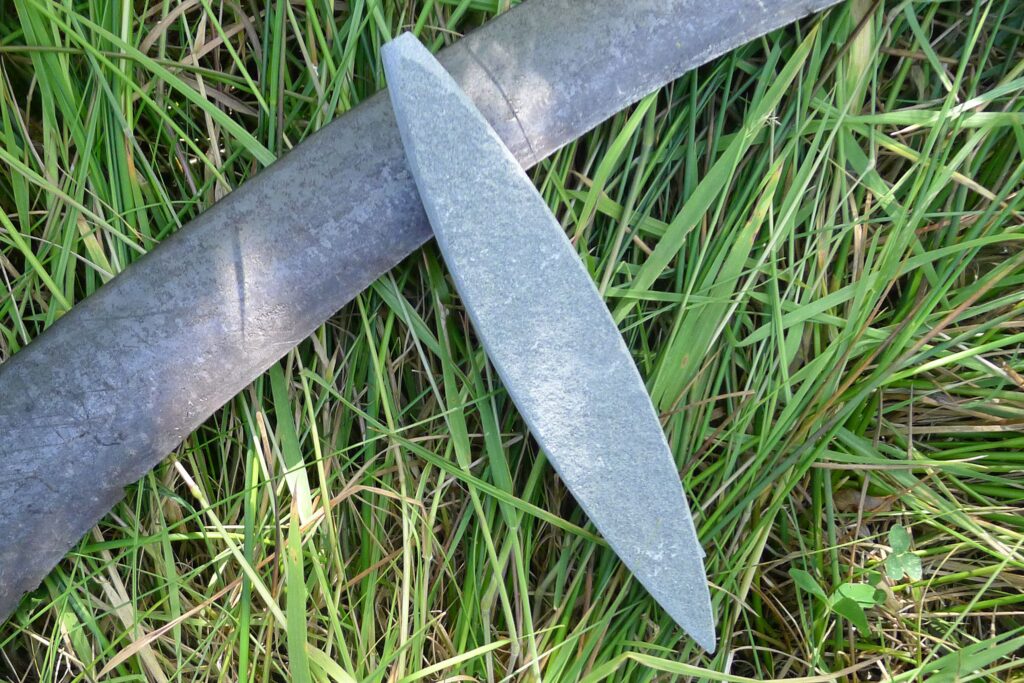
Two stones are generally required for sharpening the blade. One is coarse and is used occasionally to maintain and improve the profile of the bevel or to repair minor damages. A fine stone is needed for regularly touching up the blades edge in the field. This should be done roughly every 5-10 minutes of use. It is worth searching some of the many videos on YouTube as it’s much easier to grasp this task visually. Here is the gist of it:
- The bevel is on the uppermost side of the blade, so that the blade bites downwards into the stem of the grass (rather than upwards which would give the grass more of an opportunity to bend away from the blade).
- The bevel on the upper side of the blade is very slightly greater than the angle created when your curved scythe stone rubs both against the sharp edge and the back rib of the blade. In other words if the end of your stone is rattling against the rib when you sharpen, this is OK, and means you have almost the right angle and are merely inflicting very marginal wear on your stone.
- The underside of the blade is basically flat (though rounded), and the object is to remove the burr created when you sharpened the top side.
- Strokes should be outward, with the stone moving in the direction in which the blade cuts. Strokes should start at the handle end of the blade and progress towards the tip.
- The most normal stance for sharpening is to hold the scythe upside down, with the top of the snath on the ground and the blade pointing outward and away from you towards the right, at an angle of about 45 degrees when viewed from above.
After prolonged use you will find that the blade does not cut so well despite your diligent sharpening. This is because Austrian scythe blades are wedge shaped and after a while of cutting and sharpening the thin edge gets eaten away and lost as you move into the thicker part of the blade. Now the blade must be thinned out at the edge so its former sharpness can be regained.
Peening
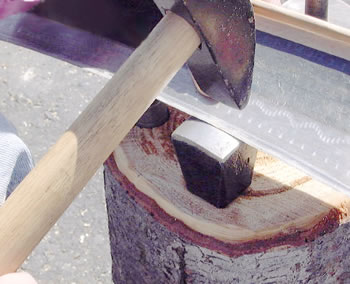
Peening involves hammering out the edge of the scythe to make it thinner. Traditionally, this was done with a hammer and a tiny anvil. As metal is malleable it can by drawn out to a thinner finish with careful hammering. The hammering also work-hardens the metal which enhances edge retention. The steps are:
- The anvil must be mounted on a vice or lump of wood
- The hammer is used to redistribute the metal ever so slightly.
- The cutting zone is drawn over the crown of the anvil gradually as the hammer strikes the metal. Coordinate the blade movement with the frequency of hammer blows. Try to keep the edge flat on the anvil crown. Set an easy sustainable rhythm and work the blade from the beard (part of blade closest to snath) to the tip. Examine the results, and start over again. With good light you should be able to see the results of each hammer blow during the process. The metal will seem to expand forward and become thinner. As your edge approaches final thinness lighten the force of the hammer. Continue peening the blade's length as evenly as possible.
- When is the blade finished? - Press your thumbnail on the underside of the cutting edge and slide it along (carefully), you should notice a barely perceptible wave as the edge deforms. At this point the edge is about the thickness of paper. If the blade has begun to crack or fissure you have over peened - very light corrective taps can mend slight problems.
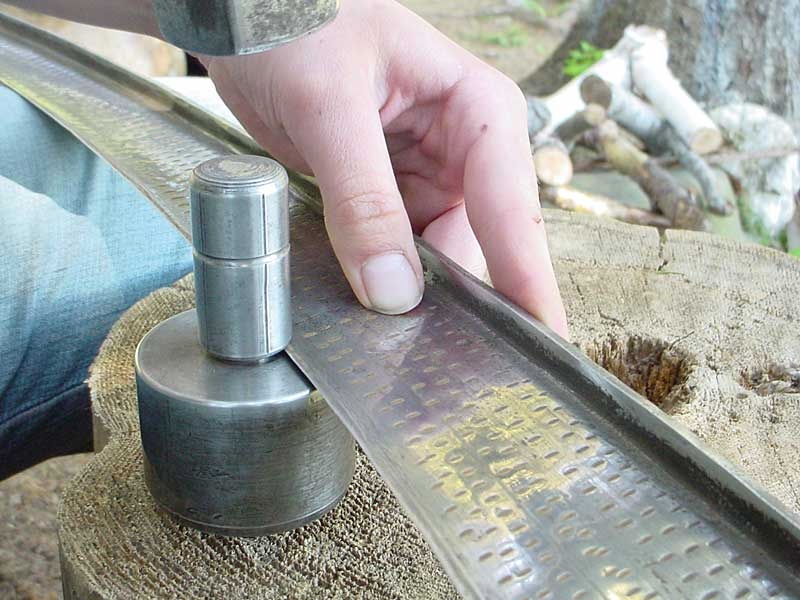
Peening Jig
A peening jig is a tool devised to make the art of peening more accessible to the beginner:
- The jig is mounted into a pre-drilled block of wood.
- The blade's edge is placed on the flat of the jig lightly touching the post
- The red cap is put over the post and the blade is worked uniformly with a hammer making a primary bevel.
- The yellow cap is then used for the finishing bevel.
- The caps are struck repeatedly with a hammer as the blade is drawn through the jig producing a line of blows near the blade edge that draws out and thins the metal.
- The process is repeated with the second cap, which is shaped so as to create a line of peening closer to the blade edge then the first.
The jig is relatively easy to use and requires less accuracy then freehand peening. It produces good results for most circumstances, and can produce excellent results with practice.
Browse our full range of Scythes, Sickles and Accessories here.