Microgreen Magic


With Covid keeping us all confined and the garden going into winter mode it’s time to turn inward and grow some magic in your kitchen. Not just for the five star restaurants - microgreens will raise your ham sandwich to gourmet level. Microgreens are easy to grow and will provide you with fresh nourishing greens even in the depths of winter.
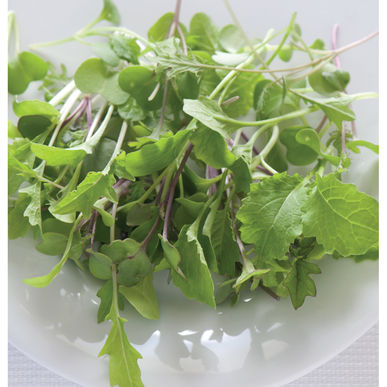
What are Microgreens? Microgreens are tiny edible plants that are older than a sprout, but younger than a full-grown plant. Microgreens are harvested after the first “true” leaves have developed. They need soil and light to grow. Like sprouts, they are a concentrated nutrient source and packed with beneficial enzymes because of their rapid growth. They are often very attractive and colourful, with delicate leaves.

What are the best seeds for Microgreens?
This depends on the leaf that you want in the end! All viable seed will grow into microgreens - but some are more colourful or have a spicy taste. Black Kale will give you lovely dark leaves while sunflower will give you bulk and a good textured leaf. The brassicas and mustards will give a hot spicy taste whilst peas will give you both that lovely fresh pea taste and attractive tendrils. As with sprouts you should always use seeds from a reputable source, preferably organic. We sell all our sprouting seeds in 75g, 250g and kilo packs. As well as single seeds we also sell mixes. At FHF all our microgreen seeds are certified organic and come from a HACCP approved supplier. They have a minimum germination rate of 85%
What equipment do I need? Good quality organic seed compost is essential. You will also need trays of some sort – either seed trays or small containers. During the darker days of winter you might need some extra light.
Getting started
- Soak the seeds for 2-4 hours. Rinse and drain well.
- Sprinkle the soaked seeds over a tray of compost and press down gently.
- Use more seeds than you would normally to ensure a good crop of leaves.
- Cover with a fine layer of compost. Put the tray in a bright place - you miught need extra light in winter.
- Keep compost moist (but not soaking). You should see signs of germination after about 6 days.
- Microgreens are best kept at a steady temperature of about 20°C
- Cut after about two weeks, or when you are happy with your crop!
- You can boost your indoor garden with a little light in winter.
How to use your Microgreenss Microgreens can be added to anything either as a garnish or to give a real pop of taste. Radish microgreens added to a simple lettuce salad can transform both taste and nutrient value. Microgreens can also be added to smoothies, dips and pesto to really ramp up the nutrient level. Avocado on toast – sprinkle on a few microgreens and you are suddenly dinning in an exclusive cafe.
Nutrition From Wikipedia - 'A nutritional study of microgreens was conducted in 2012 by the Department of Nutrition and Food Science, University of Maryland. The study concluded that microgreens have considerably higher levels of vitamins and carotenoids—about five times greater—than their mature plant counterparts. Researchers also found that some microgreens like red cabbage, coriander and radish contain up to 40 times higher levels of vital nutrients than their mature counterparts. For example, red cabbage microgreens had 40 times more vitamin E and six times more vitamin C than mature red cabbage. Coriander microgreens had three times more beta-carotene than mature coriander'
Whatever your reasons for growing Microgreens it's a fantastic and easy way to have fresh greens in winter, especially now when going to the shop might not be possible.